This file is meant to give you a short introduction to the usage of Coverlipse. It is assumed that you know the basics about the usage of the Eclipse plattform, for example that you know where to find the project properties. Running a JUnit test with Coverlipse
You'll need a class and a JUnit Test for the following steps. If you already
have one, you may skip the next paragraph. Setting up an example Project
If you don't have a JUnit Testcase right now, create a new Java project and
download an example class and a TestCase for that class into your newly
created project. The default package will do for this Howto (I'm not saying
its good style!). You'll need to refresh your
project and include JUnit in the classpath. The latter is done in the project
properties. Include the $JUNIT_HOME variable to
your classpath and edit the newly created entry such that it points to $JUNIT_HOME/junit.jar. See here for a screenshot of an
approprietly configured project properties window. Configuring a launch target for Coverlipse analysis
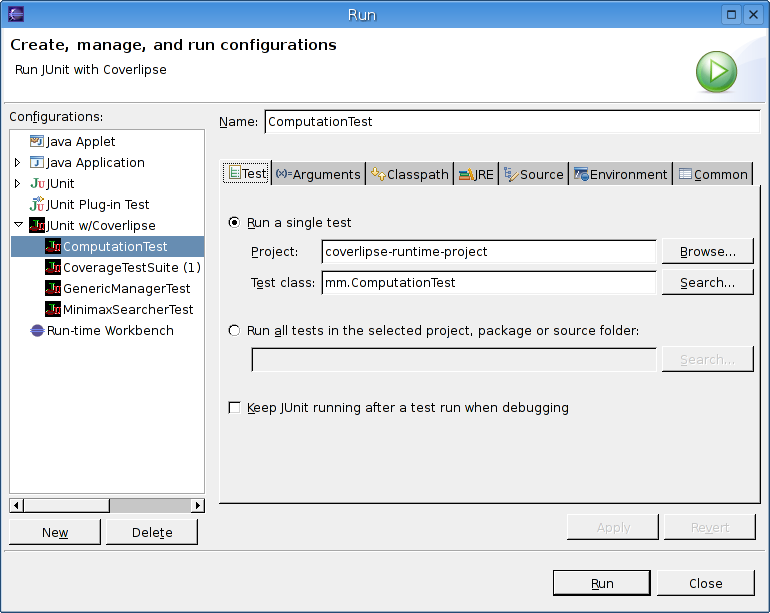
Now that you have a working JUnit Testcase, lets run a coverage analysis. For
that, either use the launch shortcut or use the launch target dialog as
follows: General usage hints
|


 mkempka.de)